
How to Prepare Concrete Before Applying a Polyurethane Expansion Joint
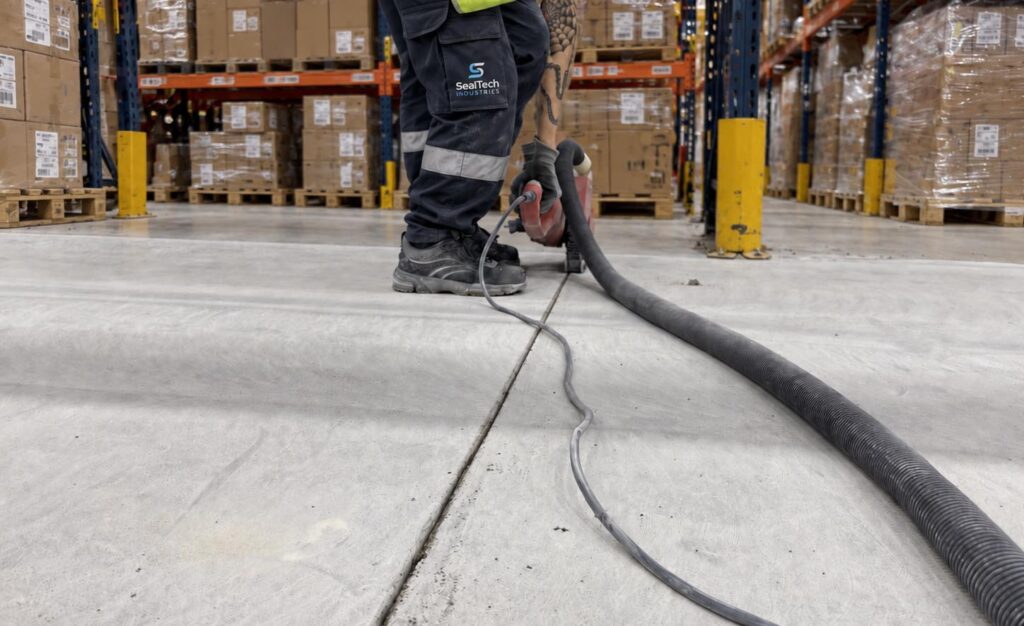
Poor concrete preparation is one of the most common reasons a polyurethane expansion joint fails earlier than expected. Even a high-quality polyurethane sealant will struggle to perform if the joint hasn’t been properly cleaned, dried, profiled and prepared before application.
Dust, moisture, oils, old sealant and weak concrete can all interfere with adhesion. Over time, normal slab movement, traffic and exposure to the elements can then cause the sealant to pull away, blister or tear. The result is often water ingress, damaged joint edges and potentially expensive concrete repairs.
For commercial, industrial and civil projects, getting the preparation right from the beginning is essential to achieving a durable, watertight expansion joint.
Common Failure Points Caused by Poor Preparation
- Adhesion Failure (Debonding): Dust, oil, form-release agents, curing compounds and existing coatings can prevent polyurethane from bonding directly to the concrete. Once the joint is exposed to slab movement and environmental stresses, the polyurethane expansion Joint replacement may begin pulling away from the joint walls.
- Cohesive Failure and Blistering: Polyurethane should not be applied over damp or wet concrete unless the specific system is designed for those conditions. Trapped moisture can contribute to bubbling, blistering and off-gassing as the sealant cures, weakening the finished joint and increasing the risk of premature tearing.
- Three-Sided Adhesion: A polyurethane joint should generally bond to the two opposing joint faces rather than the bottom of the joint as well. Without a correctly installed backer rod or bond-breaker tape, the sealant can adhere on three sides. As the concrete expands and contracts, this restricts the sealant’s ability to move and places unnecessary stress through the polyurethane bead.
- Spalling and Joint Edge Damage: Cracked, weak or crumbling joint shoulders need to be repaired before sealing. Otherwise, the polyurethane may bond successfully to concrete that is itself unstable. Under traffic or movement, the concrete can break away and take the sealant with it.
Benefits of Properly Preparing a PU Expansion Joint
Taking the time to prepare an expansion joint correctly can make a significant difference to its performance and service life, particularly in demanding commercial and industrial environments.
- Better Movement Accommodation: Correct joint dimensions and backer rod installation allow the polyurethane sealant to flex as the slabs expand and contract. Depending on the selected sealant and manufacturer specifications, some polyurethane systems can accommodate movement of ±25% or more.
- Reliable Protection Against Water and Contaminants: Clean, properly prepared and, where required, primed joint faces help create a continuous seal. This reduces the risk of water penetration, sub-grade erosion, slab undermining and exposure to chemicals or other contaminants.
- Longer Service Life: Removing laitance, dust, moisture and other bond-breaking contaminants gives the sealant the best possible surface to adhere to. Good preparation helps reduce premature failures, maintenance requirements and costly return visits.
- Protection for Joint Edges: Properly repaired joint shoulders and a neatly finished polyurethane seal can help protect concrete edges from chipping and spalling, particularly in areas exposed to forklifts, trucks, trolleys and regular pedestrian traffic.
How to Prepare Concrete for a Polyurethane Expansion Joint
A reliable Polyurethane Expansion Joint starts well before the sealant cartridge or sausage is opened. The following preparation process helps create the conditions needed for a strong, flexible and long-lasting seal.
1. Mechanically Clean the Joint and Repair Damaged Edges
Start by removing all old sealant, loose concrete and contaminants from the joint.
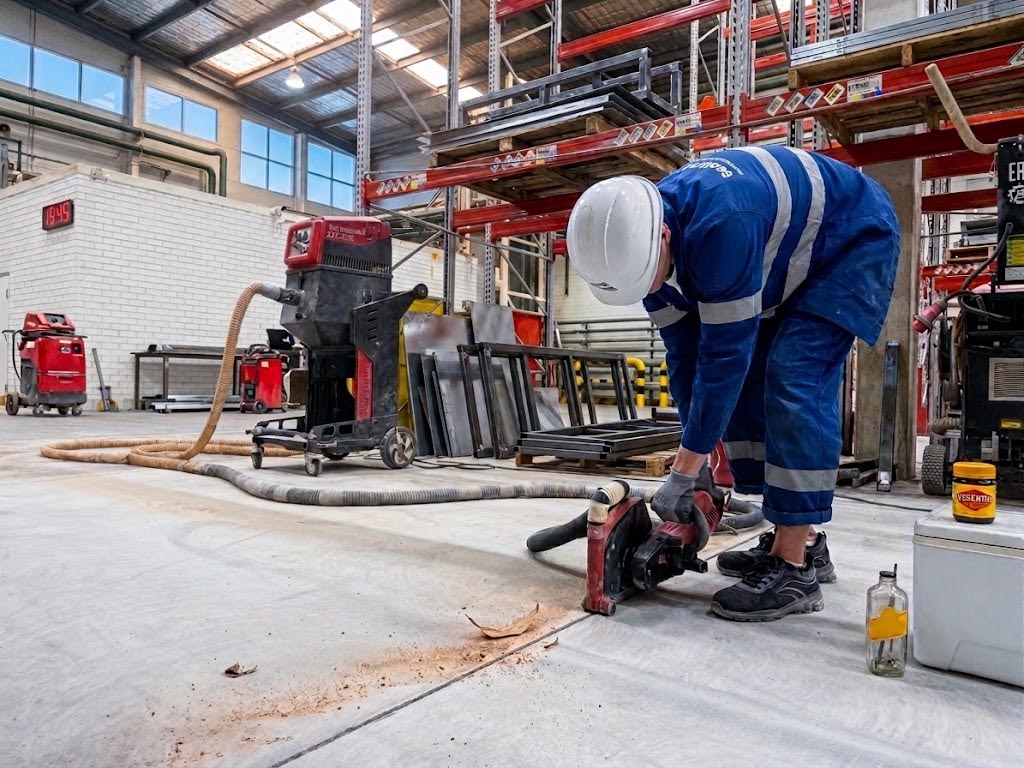
Rake out or saw-cut deteriorated sealant, vegetation and loose debris. Where necessary, grind or saw-cut the joint faces to remove curing compounds, form oils, coatings and weak surface laitance.
The aim is to expose clean, sound concrete that provides a suitable bonding surface for the Polyurethane Expansion Joint.
Any spalled, cracked or damaged joint shoulders should also be repaired using a suitable high-strength repair mortar or epoxy repair system. Allow the repair material to cure in accordance with the manufacturer’s requirements before continuing with the sealing process.
2. Remove Oil and Check for Moisture
Oil, grease and chemical residues can seriously affect polyurethane adhesion, so contaminated joint faces need to be cleaned with a suitable product before sealing.
Moisture is equally important. The concrete should meet the moisture requirements specified by the polyurethane sealant manufacturer before application.
Where required, use an appropriate moisture meter or another approved testing method to confirm the substrate condition. Applying polyurethane to unsuitable damp concrete can contribute to blistering, bubbling, poor adhesion and off-gassing during the curing process.
3. Vacuum the Joint Thoroughly
Once the joint faces have been mechanically prepared, remove all remaining dust and grit.
An industrial vacuum with a narrow nozzle is ideal for reaching into the joint and removing fine particles that may not be obvious from the surface. Even a thin layer of concrete dust can reduce adhesion between the polyurethane and the substrate.
Take care when using compressed air. Oil-lubricated air lines can introduce fine oil droplets onto freshly prepared concrete, potentially contaminating the exact surface you’ve just worked to clean.
4. Install the Backer Rod
The backer rod is an important part of a correctly designed Polyurethane Expansion Joint. It controls the depth of the sealant, helps create the correct bead profile and prevents unwanted three-sided adhesion.
A closed-cell polyethylene backer rod is commonly used for this purpose. It should be installed with a blunt tool to avoid puncturing or damaging the rod.
As a general guide, select a backer rod approximately 25% larger than the joint width so it remains securely in position through compression.
The installation depth should be based on the joint dimensions and the polyurethane manufacturer’s requirements. A 1:2 depth-to-width ratio is commonly used for joints wider than 10mm, while narrower joints may require a 1:1 ratio, subject to the product’s specified minimum sealant depth.
Always follow the technical data sheet for the selected polyurethane system rather than relying on a universal joint profile.
5. Prime the Concrete Where Required
Not every polyurethane system requires a primer, but where one is specified, it needs to be applied correctly.
Use the manufacturer-recommended concrete primer on the joint faces, typically applying it evenly with a suitable brush. Avoid excessive primer or allowing it to pool inside the joint.
Pay close attention to flash-off and application times. Depending on the system, the concrete expansion joint sealant may need to be installed within a specific window after priming to achieve the intended bond.
6. Mask the Joint Edges
Masking both sides of the joint helps produce a clean, professional finish and keeps excess polyurethane away from the surrounding concrete.
Apply suitable masking tape along the top edges before installing the sealant. Once the polyurethane has been applied and tooled to the required profile, remove the tape promptly before the sealant develops a surface skin.
This simple step can make a major difference to the finished appearance, particularly on exposed concrete surfaces where neat joint lines matter.
Partner with Gold Coast and Brisbane’s Expansion Joint Specialists
Surface preparation isn’t simply an extra step in movement or expansion joint sealing — it’s a major part of what determines whether the finished joint performs as intended.
At sealtechindustries.au, we provide commercial-grade
- expansion joint replacement,
- concrete joint repairs and
- polyurethane sealant solutions
for commercial, industrial and civil concrete applications across Gold Coast, Brisbane, Logan, Ipswich, and Tweed Heads.
From repairing damaged joint shoulders and preparing concrete surfaces through to backer rod installation, priming and polyurethane application, our focus is on creating expansion joints that can handle movement, moisture and demanding site conditions. Whether you’re dealing with deteriorated existing joints or planning expansion joint maintenance, our team can help determine the right preparation and sealing system for the application.
Protect your concrete before minor joint problems become costly repairs. Contact sealtechindustries.au to request for a FREE quote or speak with our team about your concrete expansion joint requirements.
Related posts:
- What to Expect from Maudsland’s Emergency Expansion Joint Replacement Services August 29, 2026
- Why SealTech Industries’ Expansion Joint Maintenance System Is the Right Choice for Your Business August 21, 2026
- Strata Manager’s Guide to Expansion Joint Replacement in Parkwood Apartment Complexes August 20, 2026
- How Precision Caulking for Industrial Facilities Prevents Costly Water Ingress August 18, 2026
- Why Ipswich Asset Managers Trust SealTech as Their Joint Sealing Contractor July 24, 2026
- Best Practices for Designing a Concrete Joint Waterproofing System July 22, 2026
- The Engineer’s Guide to Expansion Joint Waterproofing for Long-Term Structural Protection July 16, 2026
- Why You Must Calculate Movement Capability Before Sealing Industrial Concrete July 9, 2026
- Sealing Concrete Joints for High-Rise Commercial Buildings: Managing Extreme Thermal Movement July 8, 2026
- How SealTech’s Silicone Waterproofing Meets Strict Building Codes June 4, 2026
SealTech Industries
Expert joint sealing & waterproofing solutions for Southeast Queensland.
Contact Us