
How to Properly Install, Repair or Replace Concrete Expansion Joint Filler in High-Traffic Slabs
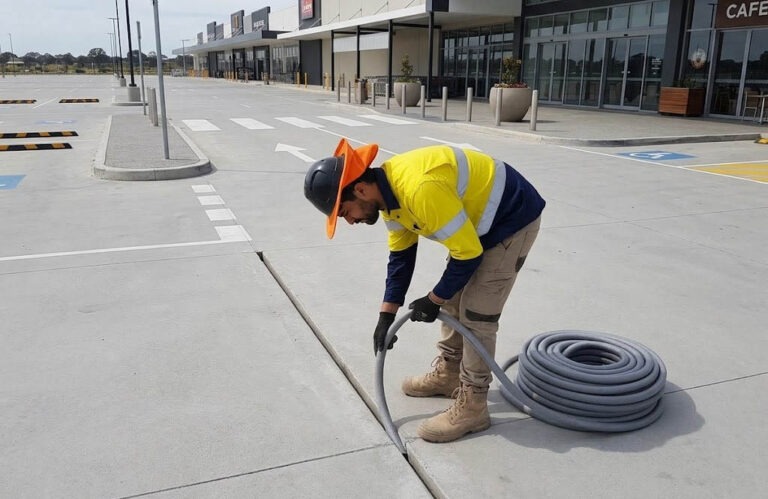
“Surface Prep, Material Selection, and Application Techniques That Prevent Premature Failure”
Joints are usually the first part of a slab to fail, whether it’s a warehouse floor, a loading dock or a residential driveway. This guide covers concrete expansion joint filler installation, repair and replacement using semi-rigid polyurethane or polyurea products.
Whether handling industrial factory floors, residential driveways, or commercial sites requiring professional concrete expansion joint sealing Gold Coast and concrete expansion joint repair Brisbane, following a systematic workflow ensures long-term slab durability under heavy vehicular traffic.
1. Joint Geometry & Material Selection
Semi-rigid filler (Shore A 80 / Shore D 40-50) is the standard for control and contraction joints under hard-wheeled traffic. It supports the joint edges so forklift wheels don’t spall them.
Flexible polyurethane sealant (Shore A 25-40) suits true expansion and isolation joints with significant movement, or joints that don’t carry hard-wheeled traffic. High-traffic industrial floors, loading docks, and projects involving concrete driveway expansion joint sealing require an elastomeric polyurethane sealant paired with correct joint proportions and backing materials:
- Depth-to-Width Ratio: For joints up to 12 mm (1/2 in) wide, the depth must equal the width (1:1). For joints 12 mm to 25 mm (1 in) wide, depth should be half the width (1:2), maintained at a minimum sealant depth of 6 mm (1/4 in).
- Backer Rod Selection: Use a closed-cell or non-gassing polyolefin backer rod compressed 25% to 30% larger than the joint width. The sealant must not adhere to the bottom of the joint; three-sided adhesion causes stress concentration and premature tearing.
- Edge Protection (Spall Protection): High-traffic joints require a receded bead (3 mm to 6 mm below the slab surface) so vehicular tires bridge the joint rather than impacting the polyurethane.
2. Step-by-Step Concrete Expansion Joint Filler Installation & Replacement Workflow
Inspect the Existing Concrete Expansion Joint
Before installing or replacing polyurethane joint filler, inspect the existing joint for cracks, missing sealant, adhesion failure, water penetration and damaged concrete edges. Determine whether the joint requires minor repairs, complete sealant replacement or additional concrete restoration. For high-traffic slabs, consider vehicle loading, joint movement and exposure to weather conditions before selecting a suitable polyurethane sealant.
- Remove Old Filler & Rake Joints:
Required for concrete expansion joint filler replacement. Remove failing polyurethane, asphaltic foam, or deteriorated filler using a concrete saw with a diamond blade, joint plow, or vertical router. Grind or saw-cut the concrete side faces down to sound substrate to ensure all old bond breaker, oil, and decayed material are completely eliminated during concrete expansion joint filler replacement. - Re-establish Joint Edges & Repair Spalls:
Protects edges under heavy wheel loads. Inspect joint shoulders for micro-fractures or spalling. If edges are damaged, rebuild joint shoulders using a high-strength epoxy or polyurethane repair mortar before applying sealant. Re-cut the joint line once the repair mortar cures. - Clean & Prepare Concrete Substrate:
Essential for concrete driveway expansion joint sealing. Mechanically wire-brush or blast joint sidewalls. Clean out dust, sand, and debris using dry oil-free compressed air (>90 PSI) or an industrial vacuum. The concrete substrate must be clean, structurally sound, dry (typically <4% moisture content), and free of curing compounds or laitance.-
Check dimensions
- For control joints, filler depth should be roughly equal to, or at least half of, the width. For flexible sealant, a 2:1 width-to-depth ratio is common, with depth up to about 12 mm.
- Semi-rigid filler in trafficked areas often needs at least 50 mm depth.
- Saw cuts under 6 mm may need widening.
-
- Prime Joint Sidewalls:
Mandatory for high-traffic or outdoor slabs. Apply the manufacturer-specified polyurethane primer to the vertical joint faces using a clean brush. Allow the primer to dry to a tack-free state per technical data sheet specifications prior to sealant installation.- Prime the sidewalls only, if the manufacturer requires it, and let the primer flash off to the specified tack state.
- Mix two-part products at the exact ratio with a low-speed drill to avoid entraining air, and mix only what you can place within pot life.
- Fill gun-grade products from the bottom up to avoid voids. Pour self-leveling products steadily from one end.
- Use masking tape for clean edges and remove it before the filler skins over.
- For forklift traffic, keep the filler flush or about 3 mm below the surface so wheels bear on the concrete.
- Cure:
- Rapid-cure products can take 1-24 hours before traffic, depending on temperature and product. Keep water, chemicals and traffic off until the filler is firm.
- Set Backer Rod & Prep for Installation (or bond breaker):
Controls sealant depth & prevents three-sided bonding. Insert the closed-cell backer rod to the calculated uniform depth using a blunt roller tool. Ensure you do not puncture the skin of closed-cell rods during concrete expansion joint filler installation to prevent off-gassing bubbles in the liquid polyurethane. - Dispense & Tool Polyurethane Sealant:
Ensures full wet-out & recessed finished profile. Dispense multi-component or single-component polyurethane sealant using a high-thrust gun, filling the joint from the bottom up to eliminate air voids. Tool the sealant immediately using a dry joint knife or concave spatula, pressing material against joint faces and leaving the center 3 mm below the slab surface.
3. Maintenance Protocols for Industrial & High-Traffic Slabs
| Maintenance Action | Cause / Trigger | Corrective Procedure |
|---|---|---|
| Cohesive Tear Repair | Excess thermal expansion/contraction split sealant center | Cut out damaged center, re-prime sidewalls, install thin overlay bead or complete section replacement. |
| Adhesion Failure | Concrete moisture, dust, or missing primer | Full depth removal of joint section, mechanical grinding of sidewalls, re-priming, and fresh sealant installation. |
| Spalled Concrete Shoulders | Heavy hard-wheel forklift impact on raised sealant | Saw-cut spall perimeter, rebuild shoulders with semi-rigid epoxy mortar, and install new recessed polyurethane bead. |
| Curing Protection | Traffic exposure during cure window | Isolate area for 24–72 hours (depending on ambient humidity and temperature) until shore hardness reaches full rating. |
Concrete driveway expansion joint sealing (Brisbane and Gold Coast)
Concrete driveway expansion joint sealing follows the same principles at lighter loads. A flexible, UV-stable polyurethane sealant is usually a better choice than a hard semi-rigid filler, because driveways carry vehicle tyres rather than steel forklift wheels but face more sun, rain and thermal movement.
Concrete expansion joints help protect driveways, car parks, warehouses and industrial slabs from damage caused by temperature changes, concrete movement and repeated vehicle loading. However, when joint fillers crack, deteriorate or separate from the concrete, water and debris can enter the gaps, increasing the risk of joint edge damage and costly repairs.
Professional concrete expansion joint sealing Gold Coast or Brisbane work faces similar conditions plus coastal exposure. Salt air, pool chemicals and constant moisture accelerate joint breakdown in driveways, pool surrounds, car parks and commercial slabs.
For property owners and facility managers across Brisbane, the Gold Coast and Logan, understanding the correct procedures for professional concrete expansion joint filler installation, repair and replacement is essential for maintaining durable, functional concrete surfaces.
Inspect and Maintain Sealed Concrete Joints
After installation, allow the polyurethane sealant to cure according to the manufacturer’s instructions before reopening the area to vehicles or heavy equipment.
Regularly inspect the joints for cracking, separation, excessive wear and water infiltration. Minor localised defects may be repairable, while extensive sealant deterioration generally requires complete concrete expansion joint filler replacement. Routine maintenance helps preserve the performance of concrete joints and extend the service life of high-traffic slabs.
Professional Concrete Expansion Joint Installation, Repair & Replacement
At SealTech Industries, we provide professional concrete expansion joint sealing, repair and replacement services for residential, commercial and industrial properties across Brisbane, the Gold Coast and Logan.
Our services include
concrete expansion joint filler installation, concrete expansion joint filler replacement, concrete driveway expansion joint sealing, and remedial joint sealing for high-traffic concrete slabs.
Whether your existing polyurethane joint filler has deteriorated or your new concrete pavement requires professional sealing, our experienced team can assess the joint conditions and recommend the most effective solution to ensure long-term performance and protection.
SealTech Industries
Expert joint sealing & waterproofing solutions for Southeast Queensland.
Contact Us